Header

Facebook Pinterest Blog Home

Wednesday, December 4, 2013

I'm a Prepper Foodie ... with a "Group"

... all these years of researching, taking classes, experimenting, trying again ... being a foodie best fits with the passion I have for EATING and making sure the family around me will be able to eat too.  It's evolved over the years to love - love - loving being self sufficient, stocking an in-home pantry, growing our own food, understanding nutrition, finding deals and expanding local resources. 

The preparedness part is really synonymous with my love of eating.  I can't tolerate the thought of ever being in a situation that my little ones would go hungry.  And as intolerable as being hungry would be; the monotony of typical food storage selections wouldn't be fun either.  So, I began to look for ways to economically acquire foods that would create variety in my prepper plan.  I quickly found that we had much more leverage for pricing if we could order in larger quantities.  So - the group ordering hub was created - the parent company is The Chilly Lizard Trading Post and the store front is www.ichowlocal.com

In a nut shell; Group Ordering and information sharing is ...
  • me finding products as close to the supplier, farmer & grower as possible;
  • letting other's know;
  • collecting the orders
  • and then bringing it in. 
By joining forces in this way - we expand our resources, our connections, our purchasing power.   I appreciate your personal efforts to be more healthy, to prepare your homes and families.  You inspire me and strengthen my resolve to continue expanding our network.

Here are some upcoming products we will be ordering in the next couple of months:
  • Honey
  • Oats (all kinds)
  • Brown Rice Flour
  • Tapioca Flour
  • Sorghum Flour
  • Hard White Wheat
  • Multiple spices
  • Bulk cleaning supplies
  • Solar Cookers
  • Gun Holsters
  • Fresh tomatoes
  • Fresh potatoes
  • Fresh salad greens


Sunday, August 18, 2013

What do you know about CORN?

According to Widipedia:  (which of course knows everything) ...  Sweet corn occured as a spontaneous mutation in field corn and was grown by several early Native American tribes.  The Iroquois gave the first recorded sweet corn (called Papoon ... kind of like that name) to European Settlers in 1779.  It soon became a popular food in southern and central regions of the United States.

Open pollinated varieties of white sweet corn started to become available in the U.S. in the 19th Century.  Hybridization, which is what we see most of now, allows for more uniform maturity, improved quality and disease resistance.  This is not to be confused with GMO.  Do your own research between hybrid's and GMO's to gain a greater understanding of what can impact our foods.

Anyway - back to the corn.  We have the opportunity to get Sweet Corn grown in Enterprise for the next few weeks.  Serendipity is the sweet corn we will be receiving.  Corn evokes powerful memories in me, everything from crunching down on a sweet cob of corn as a child; tasting the ice cold creaminess of brazillian milho verde (corn ice cream) to driving through the corn fields of Nebraska and being pelted by giant field bugs as they hit our wind shield.  Not a pretty site --

Well, when you get tired of eating your baggies of frozen corn ...  here's a few NEW recipes for you  --  Corn Pudding and Corn Ice Cream ...  This next recipe was revised from The Technicolor Kitchen Blog


This corn pudding is traditionally served during the June Festival in Brazil. It's a sweet pudding made from corn, milk, and sugar, sprinkled with cinnamon, and served cold.

Prep Time: 20 minutes

Cook Time: 15 minutes

Total Time: 35 minutes


Ingredients:
  • 6 ears of fresh corn
  • 3 cups of milk
  • 3/4 cup sugar
  • pinch of salt
  • 3 tablespoons butter
  • cinnamon
Preparation:
  1. Scrape the kernels off of the ears of corn.
  2. Place the corn in a blender (or food processor) with the milk, and blend well, for at least 3 minutes.
  3. Strain the corn/milk mixture through a fine mesh sieve into a pot. Discard the fibrous parts of the kernels that remain in the sieve.
  4. Add the sugar, a pinch of salt, and the butter to the pot, and bring mixture to a simmer.
  5. Cook, stirring continuously, until the mixture becomes thick and creamy, about 15 minutes. If it's thick enough, you should be able to drag a wooden spoon across the bottom of the pot and see the bottom for several seconds before the mixture closes in on itself.
  6. Remove from heat and let cool. Pour pudding into a serving dish. Sprinkle with cinnamon.
  7. Chill thoroughly, and serve cold.


Sweet corn ice cream

1 can (200g) corn kernels, drained and rinsed (this is a scant 1 Cup Measurement of Corn Kernels, cooked on the cob first and then cut off - I have also seen this recipe done with corn "uncooked" seems like you'd get more "corn cream" if it was cooked a bit.
1 ¼ cups (300ml) whole milk
1 can (395g) sweetened condensed milk
1 cup (240ml) heavy cream
¼ teaspoon ground cinnamon
pinch of salt

Place the kernels and milk in a blender and blend until smooth. Push mixture through a sieve and put it corn "cream" back in the blender. Add the sweetened condensed milk, heavy cream, cinnamon and salt and blend.
Pour into a metal/glass bowl, cover and refrigerate for at least 2 hours, then freeze in your ice cream maker according to the manufacturer’s instructions.
Transfer ice cream to an airtight container and put in the freezer until firm, at least 4 hours, before serving.

... gotta run, looking at all this food is making me hungry! 


Saturday, August 17, 2013

FREEZE it for later ... CORN

Here's a quick tutorial on how to FREEZE the fresh corn you have access to NOW.   This corn will taste much, much better than it's frozen store-bought counterparts and more importantly you will KNOW where it came from and what's in it.  It's really quite fast and easy if you have the space in your freezer to keep it. 


Tips:
  •     Do this as quickly as you can from harvest.  IF there is going to be a delay from when it's picked to when you can process your corn; put it in the FRIDGE or in a cooler with ice as the sugars break down quickly at room temperature.

  •     We do this whole process outside, usually in the evening when it's a bit cooler.  You can do it inside too on a smaller scale.

  • We also LOVE using a propane outdoor cooker - much faster than trying to navigate pots on a stove for the volume that we do.   But again, inside on the stove in smaller quantities would be fine too.
    P.s. get your family involved - knowing how to do simple things like this is sooo important!
 
 
You will need:

    Corn
    Large pot of boiling water
    Large bucket of cold ice water (we use a chest cooler because it's usually so hot outside)
    Food saver style vacuum sealer OR simply use ZIPLOC "freezer" bags
    Sharp Knife (or other corn cutting device)
    Cutting board, cookie sheet or cake pan (something to keep the corn from flying all over the place when you are cutting off the cob).
    Dish towels just to clean up


STEP 1:  Get your BIG pot and fill it 3/4 full with water.  Turn it on High and get that water hot.


STEP 2:  While the water is heating, take the husks off your corn (sometimes you will find worms at the top of the corn; just wack off the top 1 or so of the cob when you see them; not a big deal, it just means your corn wasn't sprayed to death with pestacides - that is a GOOD thing).  Get off as much silk as you can either with your hands or a soft vegetable brush.

STEP 3:  Blanch it.  All fruits and vegetables contain enzymes that, over time, break down the destroy nutrients and change the color, flavor, and texture of food during frozen storage. Corn requires a brief heat treatment, called blanching, in boiling water or steam, to destroy the enzymes before freezing. Blanching times generally vary from one to 10 minutes, depending on the vegetable. The duration should be just long enough to stop the action of the enzymes.

  •      Begin counting the blanching time as soon as you place the corn in the boiling water, noting that the water ought to return to a boil in a minute or less. If it takes several minutes or more to return to a boil, you are using too small a pot or adding too much corn.
  •     Cover the kettle and boil at a high temperature for the required length of time. You may use the same blanching water several times (up to 5). Be sure to add more hot water from the tap from time to time to keep the water level at the required height.
  •     Blanching time varies depending on the type of frozen corn you are making: cut-whole kernel, cream style or corn-on-the-cob.
  • Blanching times, for freezing the corn: Whole Kernel Corn.  - 4 to 6minutes. Cream style corn - 4 to 6 minutes.

STEP 4:  Once the corn is blanched, take it out of the water and place it in your bowl, bucket or cooler of ice water.  Let it set in there and get good and cold.  A good rule of thumb is to leave them in the cold water as long as you had them in the hot water, so if it took 7 minutes to blanch them then leave them in the cold water for 7 minutes.  We aren't that technical at my house - we are usually cutting while all the other stuff is happening so we just reach to the bottom and get the coldest ones out next to cut.

STEP 5:  Cut the kernal's off the cob.  If you do that in a large cookie sheet or sheet cake pan; the corn is easier to "capture" but I'm sure you can figure it out.

STEP 6:  Scoop up the corn and put in a baggie and get as much air out as you can.  We put 2 cups in per quart size baggie; that seems to be a good measurement for us.  Lay it flat, seal it most of the way across at the top and then roll gently from the bottom to squeeze as much air out as you can before you give it that final seal.
 

STEP 7:  Lay them flat on another cookie sheet and plop them in the freezer.

TIP:  Don't stack your corn baggies too high until they are completely frozen otherwise the corn that is in the middle won't freeze quickly and could potentially go bad while it's freezing.  Once the baggies are frozen you can stack them as high as you need to.

Friday, August 2, 2013

Tomatillo's - The Secret Ingredient

I love - love - love tomatillo's.  Probably because they are so easy to grow and are the "secret ingredient" for all the green sauces I really like.  The tomatillo is a green, tomato-shaped vegetable covered by a papery husk native to Central America.  Tomatillo's provide that tart yummy flavor in green salsa's and tomatillo dressings.  I always thought green tomatoes were the way to make chile verde ... NOT - it's the tomatillo.  


Besides just being scrumptious and yummy ... Tomatillo's give us lots of vitamin C, potassium and fiber.  I knew there was a reason why I loved green salsa.  And if this wasn't reason enough to love this little green beauty - they are super easy to use; pretty much a no brainer to use fresh or put up for later.  I'm going to start this post with the "copycat" Cafe Rio Tomatillo Ranch dressing because I pretty much "drink" that stuff .... then I'll post how to preserve it for later.


Tomatillo Ranch Copy-cat Cafe Rio Recipe

  • 2 cups ranch dressing (I usually use a packet of Hidden Valley Ranch buttermilk mix, but you can make your own Homemade Buttermilk Ranch Dressing or Buttermilk Dressing if you prefer)
  • 1/2 C chopped Cilantro (you'll want to use the leaves - not the stems)
  • 4 tomatillos (remove the paper husk)
  • minced garlic (1/2 tsp.)
  • 2 tbsps fresh lime juice
  • 1 jalapeno pepper (this gives it a little heat - not too much)
Blend it all up in the blender and you're good to go.  


Next try your hand at some Chile Verde Sauce over a pork shoulder - you're going to wish you'd tried this "like yesterday" ...


Chile Verde Recipe  (by Elise Bauer)

  • 1 1/2 pounds tomatillos
  • 5 garlic cloves, not peeled
  • 2 jalapenos, seeds and ribs removed, chopped
  • 2 Anaheim or Poblano chiles (optional)
  • 1 bunch cilantro leaves, cleaned and chopped
  • 3 1/2 to 4 pounds pork shoulder (also called pork butt), trimmed of excess fat and cut into 1 to 2-inch cubes
  • Salt
  • Freshly ground black pepper
  • Olive oil
  • 2 yellow onions, chopped
  • 3 garlic cloves, peeled and finely chopped
  • 2 Tbsp of chopped fresh oregano or 1 Tbsp of dried oregano
  • 2 1/2 cups chicken stock
  • Pinch of ground cloves

Method

chile-verde-1.jpg chile-verde-2.jpg
chile-verde-3.jpg chile-verde-4.jpg
1 Remove papery husks from tomatillos and rinse well. Cut in half and place cut side down, along with 5 unpeeled garlic cloves, on a foil-lined baking sheet. Place under a broiler for about 5-7 minutes to lightly blacken the skin. Remove from oven, let cool enough to handle.

If you want the additional flavor of chiles other than jalapenos, you can add a couple Anaheim or poblano chiles. Either use canned green chiles or roast fresh chilies over a gas flame or under the broiler until blackened all around. Let cool in a bag, remove the skin, seeds, and stem.

chile-verde-6.jpgchile-verde-5.jpg

2 Place tomatillos, skins included, into blender. Remove the now roasted garlic cloves from their skins, add them to the blender. Add chopped Jalapeño peppers, other chilies (if you are using them), and cilantro to the blender. Pulse until all ingredients are finely chopped and mixed.

chile-verde-7.jpg

3 Season the pork cubes generously with salt and pepper. Heat olive oil in a large, heavy-bottomed skillet over medium high heat and brown pork chunks well on all sides. Work in batches so that the pork is not crowded in the pan and has a better chance to brown well. Using a slotted spoon or tongs, lift pork out of pan and place in bowl, set aside.

4 Pour off excess fat, anything beyond a tablespoon, and place the onions and garlic in the same skillet and cook, stirring occasionally until limp, about 5 minutes. If your skillet is large enough to cook the entire batch of chile verde, with the sauce and meat, then add the pork back to the pan. If not, get a large soup pot and add the onion mixture and the pork to it. Add the oregano to the pan. Add the tomatillo chile verde sauce to the pork and onions. Add the chicken stock (enough to cover the meat). Add a pinch of ground cloves. Add a little salt and pepper. (Not too much as the chile verde will continue to cook down and concentrate a bit.)

chile-verde-10.jpg chile-verde-11.jpg
5 Bring to a boil and reduce to a slight simmer. Cook for 2-3 hours uncovered or until the pork is fork tender.

Adjust the seasoning to taste with salt and pepper. Serve with Spanish rice and warmed flour tortillas or freshly made corn tortillas.

Enjoy!


Saturday, May 18, 2013

Choosing the Best Apple


I came across this GREAT site that tells you all about apples. I was shocked to see how many different kinds of apples there are in the world. I had no idea! This site breaks it down to what apple is best for snacking, baking, making apple sauce...etc.
Go check out this really neat site. The link is: http://www.recipetips.com/kitchen-tips/t--1299/all-about-apples.asp.
Let me know what you think. Did you know there were so many types of apples? Crazy!

Tuesday, May 14, 2013

The New Dirty Dozen - TOP 12 foods to find ORGANIC or LOCAL

Apples


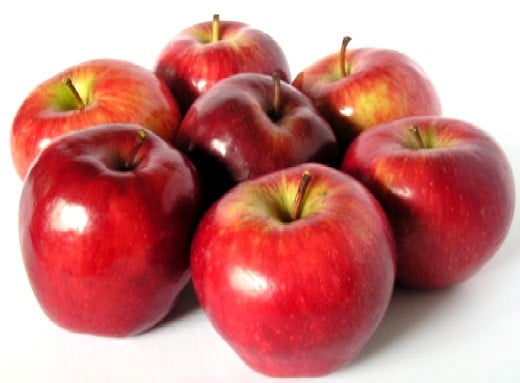
- According to the EWG report; Grocery Store Apples consistently rank near the top of the annual dirty dozen list.  More than 40 different pesticides have been detected on apples, because of the sprays farmers use to prevent fungus and insects.  You can expect to find pesticide residue in apple juice and apple sauce including baby foods. 

Celery
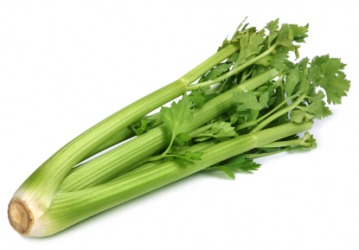
-Another food on the DD List is Celery.  It's a good one to remember since it doesn't fit the 3 main categories of foods with the highest pesticide residue (tree fruit, berries & leafy greens).  USDA tests have found MORE than 60 different pesticides on celery.

Cherry Tomatoes

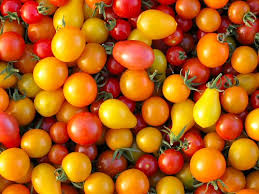
- Tomatoes have been in for some bad press in the past few years with exposes like Tomatoland highlighting the environmental, human and culinary costs of the modern tomato.  Cherry tomatoes show up on the EWG's list of Dirty Dozen foods.  If you can't grow your own, buy from a farmer's market or local gardner.

Cucumbers
- Making the 2013 list of foods with highest pesticide residue: Cucumbers which have been laced with as many as 35 different pesticides that remain on the skin even when you are ready to use them for salad.

Grapes
- Imported grapes can have more than 30 pesticides on them.  Raisins, not surprisingly, also have high pesticide residue tests.  What about wine?

Hot Peppers
- Grow your own or shop local; most are pesticide laced.

Nectarines
- Imported, are among the most highly contaminated tree fruits.  Domestic nectarines don't test with as much, but overall 33 pesticides have been detected on nectarines.

Peaches


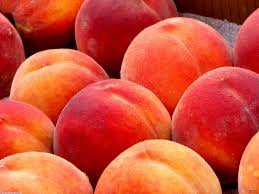
- Another regular on the DD list.  Peaches can be found with more than 60 different pesticides, and nearly as many in single serving packs; far fewer in canned peaches.  Again, buy organic or local or use safer alternatives like Watermelon, tangerines, oranges and grapefruit.

Potatoes
- I don't eat alot of these but can you believe more than 35 pesticides have been detected on potatoes?  For some reason, almost non on Sweet potatoes.

Strawberries
- Strawberries are always on the DD list; because big farmers spray for fungus.  Nearly 60 different pesticides have been found on strawberries, though fewer are found on frozen strawberries.

Spinach
- The leader in leafy green pesticide residue is Spinach (bummer) ... nearly 50 different pesticidesFrozen has nearly as many; canned a few less.

Sweet Bell Peppers
- Usually makes the DD list because it boasts 50 different pesticides.  Okay, easy one to grow here in Southern Utah - do it!

Kale

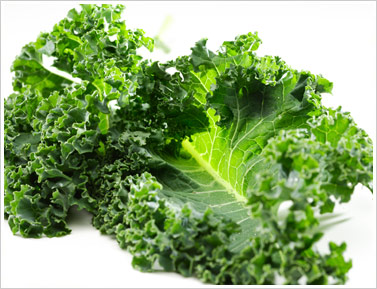
- A superfood.  A hardy, naturally pest resistant plant.  Quite puzzling why it tests high for pesticide residue.  Grow your own, find a farmer's market - buy local. 

Collard Greens
- Like kale, always on the annual DD list.  Tops out at more than 45 different pesticides

Zucchini
- The upside to this one is every gardner you know has zucchini - don't turn them down this year.  Get them out of a friend's garden or grow your own!

Lettuce
- In that leafy green category, lettuce often makes the DD list with the most pesticides - 50 to be exact.

Blueberries

- So sad about this one ... Blueberries have more than 50 pesticides detected as residue on them.  Frozen blueberries have somewhat less.  Also beware of cranberries and cherries - they are often quite contaminated as well.  If you can't find organic berries - go with bananas.


NOTE:  The latest studies say Organic "labeled" foods on a whole carry 30% less pesticide residue than non-organic and don't show a significant difference in nutritional level.  Another reason to grow your own ... or at the very least know WHERE it's grown.  Even if farmer's are NOT organic, most smaller farmers are growing in a sustainable fashion which usually means they are not using pesticides.  Ask to find out. 

ALSO:  Many of the foods listed above are the "go-to" foods for children ... please let your families know what to watch out for.  Stay current - be careful - follow your heart!

And as always check www.ichowlocal.com ... more growers and foods being added daily. 


* www.thedailygreen.com
* www.whatsonmyfood.org
* http://www.huffingtonpost.com/2013/04/22/dirty-dozen-foods-list-2013_n_3132788.html

Monday, May 13, 2013

The Dirty Dozen - EWG's 2013 Shopper's Guide to Pesticides in Produce

I'll have to admit - I've been living in la-la land because the terms "The Dirty Dozen" and "The Clean 15" were new to me until today!  Holy Shamolee's ... why didn't I know this?

A group called the Environmental Working Group posts an annual report detailing their findings of typical grocery store produce that tests the highest for pesticide residue and are the MOST important to buy organic, grow your own or purchase from a local pesticide free farmer.  You can lower your pesticide intake by avoiding the 12 most contaminated fruits and vegetables and choosing the least contaminated produce.


Here's some of their post: 
For the second year, we have expanded the Dirty Dozen™ with a Plus category to highlight two crops – domestically-grown summer squash and leafy greens, specifically kale and collards. These crops did not meet traditional Dirty Dozen™ criteria but were commonly contaminated with pesticides exceptionally toxic to the nervous system.

Though the Environmental Protection Agency has been restricting the uses of the most toxic pesticides, they are still detected on some foods. For example, green beans were on last year's Plus list because they were often contaminated with two highly toxic organophosphates. Those pesticides are being withdrawn from agriculture. But leafy greens still show residues of organophosphates and other risky pesticides. That's why they are on the Plus list for 2013.

Tests in 2008 found that some domestically-grown summer squash – zucchini and yellow crookneck squash -- contained residues of harmful organochlorine pesticides that were phased out of agriculture in the 1970s and 1980s but that linger on some farm fields.

Genetically modified plants, or GMOs, are not often found in the produce section of grocery stores. Field corn, nearly all of which is produced with genetically modified seeds, is used to make tortillas, chips, corn syrup, animal feed and biofuels. Because it is not sold as a fresh vegetable, it is not included in EWG's Shopper's Guide to Pesticides in Produce. Nor is soy, another heavily GMO crop that makes its way into processed food.

The genetically modified crops likely to be found in produce aisles of American supermarkets are zucchini, Hawaiian papaya and some varieties of sweet corn. Most Hawaiian papaya is a GMO. Only a small fraction of zucchini and sweet corn are GMO. Since U.S. law does not require labeling of GMO produce, EWG advises people who want to avoid it to purchase the organically-grown versions of these items.

I found this information quite troubling.  Their website also includes information pesticides in baby foods (what?) and that we are literally poisoning ourselves and our children before they are born.  Gosh - I thought learning how to garden was just a self sufficiency thing not a POISON issue. 

TOP TEN DIRTY DOZEN (had the most) 
1.  Apples
2.  Celery
3.  Cherry Tomatoes
4.  Cucumbers
5.  Grapes
6.  Hot Peppers
7.  Nectarines - imported
8.  Peaches
9.  Potatoes
10.  Spinach
11.  Strawberries
12.  Sweet bell peppers
13.  Kale/collard greens
14.  Summer squash


THE CLEAN 15 (had the least)
1.  Asparagus
2.  Avocados
3.  Cabbage
4.  Cantalope
5.  Sweet Corn (GMO too)
6.  Eggplant
7.  Grapefruit
8.  Kiwi
9.  Mangos
10.  Mushrooms
11. Onions
12. Papaya
13.  Pineapple
14.  Sweet Peas - frozen
15.  Sweet potatoes

I would strongly encourage you to read their FAQ page.  Here's the link  http://www.ewg.org/foodnews/faq.php.  There are many questions answered here about pesticides, whether you should be worried or not, what you can do about it.  (Choose Organic - even though Organic is not pesticide free either ... they have less).

Another important note is that the testing on these products was done "as it is typically eaten" ...

What if I wash and peel my fruits and vegetables? 

The data used to create the Shopper’s Guide™ are from produce tested as it is typically eaten. This means washed and, when applicable, peeled. For example, bananas are peeled before testing, and blueberries and peaches are washed. Because all produce has been thoroughly cleaned before analysis, washing a fruit or vegetable would not change its ranking in the EWG’s Shopper’s Guide™. Remember, if you don’t wash conventional produce, the risk of ingesting pesticides is even greater than reflected by USDA test data.

EWG has not evaluated various produce washes for efficacy or potentially toxicity. However, since some plants absorb pesticides systemically, a produce wash would have limited effect. The safest choice is to use the Shopper’s Guide™ to avoid conventional versions of those fruits and vegetables with the highest pesticide residues.

So what to do?


You'll have to make those determinations for yourself.  I'm going to:

  • Grow as much of my food as I can;
  • Find local resources for the others;
  • Stay away from processed foods because obviously they are using foods produced on an industrialized level;
  • Eat at home because chain stores are also using these commercial farmed foods;
  • Ask more questions;
  • Find farmers markets;
  • Eat seasonally;
  • Get better at cooking;
  • Help my children feed their children better than I fed them;
  • Steer clear of Grocery Store/imported produce as much as possible.
If you'd like a LOCAL resource; check out www.ichowlocal.com -- a Virtual Farmer's Market right here in St. George, Utah.  New growers & resources added daily.  And as always feel free to email me anytime.  Robin

chillylizard@gmail.com